
LB5.1. Comparing Soils
Plants are essential to the development of soil. Their dead leaves and fruits are broken down into humus by hundreds of different kinds of soil organisms. Humus is an organic mixture that is constantly broken down further by fungi and bacteria. These decomposers reuse the nutrients in once-living things and break them down into small enough molecules to be taken up by plant roots. In a healthy natural system, where plants and soils have evolved together, humus is in a state of relative equilibrium because it is continually replenished by dying organisms.
In this activity, you will investigate the components of soil, including both humus and the non-living soil components. You will also get a close-up view of some of the amazing creatures that convert the waste products of other organisms into nutrients available to plants. After observing the characteristics of different soils, you will set up plant experiments to compare the fertility of the samples, perhaps even mixing a “super soil” of your own.
What You Will Need
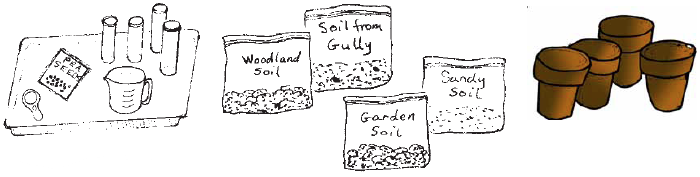
- 3-4 samples of soil,
(2 cups each) - 3-4 labeled plastic bags
- 3-4 clear plastic vials with lids (1″ in diameter, 3″ high)
- 3-4 small flower pots
- 1 package of bean or pea seeds
- 1 large spoon or garden trowel
- 1 magnifying lens
- 1-2 trays
- 1 measuring cup
- 1 small-point permanent marker
- 1 ruler
- paper towels
- water
Getting Started
Collect soil samples from several different locations: a forest, a fertile garden, and an area where much of the topsoil has been eroded. Place these samples in separate labeled plastic bags.
- Plan to collect your samples over a few weeks to take advantage of outings or trips that take you to different environments.
- As you collect and label soil samples, make notes about the nature of the vegetation at the site and the level of soil moisture.
Observe the Soils
Place a small amount of each soil on a light-colored tray or a paper towel.
- Sample each soil with your fingers to get a feel for its texture and the types of particles in each sample. If the soil feels gritty, sand is present. If the soil feels like flour, it contains a lot of fine silt. If the damp soil rolls into a smooth ball, clay is present.
- What living and dead organisms do you notice in the samples? Record your observations.
Conduct Soil Profile Tests
Conduct soil in water profile tests by putting some of each sample in water and comparing the layers of particles that settle out or float to the top.
- Fill each plastic vial with one inch of soil from the various samples.
- Fill the vial with water one half-inch from the top. Cap the vial and shake vigorously.
- Place the vial on a level surface and allow the soil to settle out for one to two minutes, then draw a diagram of the various layers.
- What materials sank to the bottom? What is floating on the top?
- Draw the layers and determine if organic matter, clay, silt, sand, and gravel are present.
- Compare the water profiles of the different soil samples collected from the different ecosystems. Which soils had the greatest amount of organic matter?
Compare Seedling Growth in Soils
Soil is a mixture of clay, silt, sand, rocks, organic matter, air, water, and living organisms. The organic material will float and is made up of decomposed plants and animals that provide nutrients for plant growth. Fertile soils have a top layer of organic humus and are dark with a crumbly consistency. They are usually composed of about one-third clay, one-third silt and sand, and one-third organic matter.
- Using the labeled samples that you have collected and the results of soil profile tests, create your own “super soil” that you think will be best to promote plant growth.
- Set up a controlled experiment to compare your “super soil” with other soils using flower pots and seeds. Be sure to control variables by keeping everything the same except for the kind of soil used.
- After a few weeks, write a report on the purpose, procedures, results, and conclusions of your experiment.