
EU10.6. Vertical Paraboloidal Cylinder Cooker
{ Energy Use Contents } { All GSS Books }
[Illustrations from the Great Explorations in Math and Science (GEMS) Teacher Guide: Hot Water and Warm Homes from Sunlight, by Alan Gould. Artists: Lisa Baker, Carol Bevilacqua, Chris Byal, and Alan Gould]
WHAT YOU NEED:
- 1 sheet of foilboard or other reflecting surface,
18″ it 44″ (46 cm :sz 12 cm) for the parabolic reflector - 1 cooking vessel, such as one of the following:
– a dark-colored pot or pan with clear or dark lid
– a clear glass jar with clear or dark lid
– a clear pyrex pot with lid - 1 sheet of reflecting surface, 12″ it 40″ (30 cm it 100 cm) for the bottom reflector
- 1 sheet of cardboard, 12″ x 40″ (30 cm it 100 cm) for top reinforcing piece
- black metal supports for the cooking vessel; these can be empty tin cans painted black (small tomato sauce or tuna cans are about the right size)
- 1 push pin
- 1 pencil
- 1 scissors
- 16 paper fasteners
CONSTRUCTION
1. Make a parabolic curve template by drawing a parabola approximately 32″ (80 cm) wide with a focal length (f) of about 8″ (20cm). You can plot a number of “x” and “y” points according to the following formula for a parabola:
y = x2 / 4f
(where f is the focal length, or
distance from the parabola to the cooking vessel)
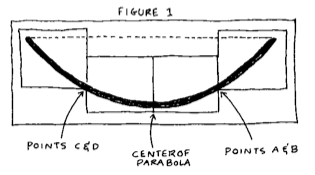
Alternatively, duplicate pages 46–49 from the GEMS teacher guide Hot Water and Warm Homes from Sunlight. Figure 1 shows how the 4 template pieces from the GEMS Teacher Guide (8/5″x11″) are laid out to form one large parabolic curve template.
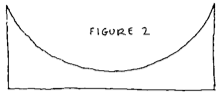
2. Using the parabolic curve template made in step 1, mark and cut the shape of the parabola on a top reinforcing piece as shown in Figure 2.
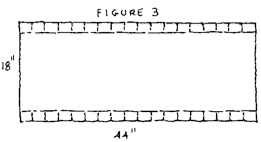
3. Draw two lines parallel to the long edges of the parabolic reflector, 1 inch (2.5 cm) from each edge. At 2″ (5 cm) intervals, cut slits in from the edges to the 1 inch line as shown in Figure 3, to make tabs.
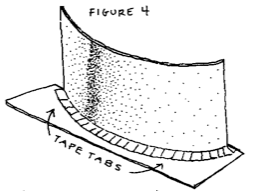
4. Fold the resulting tabs up. Line up the parabolic reflector to the parabolic curve on the top reinforcing piece. Tape the tabs to the top reinforcing piece to hold the parabolic reflector in place, as shown in Figure 4.
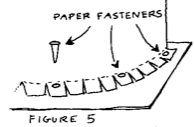
5. Punch small holes through a few of the tabs as close to the fold lines as possible. Make the holes go all the way through the top reinforcing piece. Use a push pin to punch the holes, then enlarge the holes with a pencil tip. Secure paper fasteners through the holes, as shown in Figure 5.
6. Lay the parabolic template on the bottom reflector and temporarily tape it in place. Lining up the parabolic reflector with the template, tape the tabs to the bottom reflector and secure with paper fasteners as in steps 4 and 5. Then remove the template.
7. (Optional) Tape edge sticks to each short edge of the parabolic reflector.
USING THE COOKER
1. Orient the parabolic reflector so it faces the Sun. On grassy or uneven ground, it is helpful to put the cooker on a wooden board. Put three identical blackened tin cans about 10 inches (25 cm) in front of the center of the parabolic reflector.
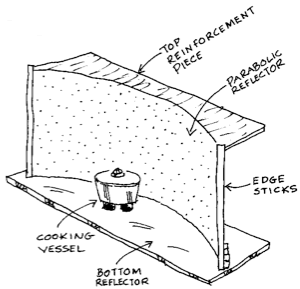
2, Put a cooking vessel containing food on top of the cans as shown in the figure at the top of this page. It will start getting hot! You can make rice, steam vegetables, warm canned foods, boil hot dogs, and cook many other foods.
3. Move the cooker about every 15 minutes to keep it facing the sun.
4. Of course, the amount of time required to cook a particular food varies. A solar cooker can take up to twice as long as the same task would take on a standard stove.
5. The solar cooker can be disassembled for easy carrying and storage.