DEW2.1. Spatial Analysis: Length
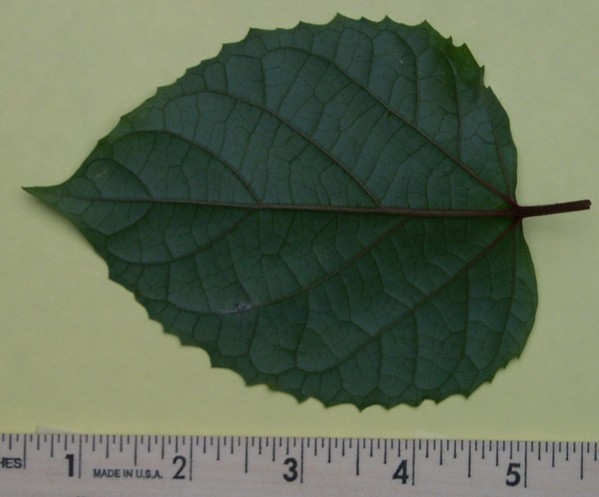
Materials
- AnalyzingDigitalImages software
- Plant Leaf with Ruler image (or any image including an object of known size such as a ruler to determine scale).
Open An Image
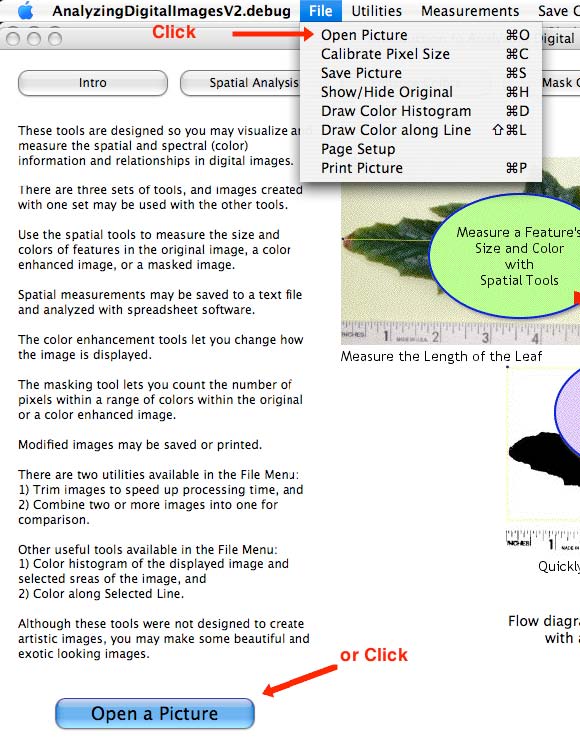
Start the AnalyzingDigitalImages software and open a picture by clicking on one of two options: “Open Picture” in the File menu, or use the “Open a Picture” button at the bottom of the screen.
Screenshot: how to open an image.
Calibration
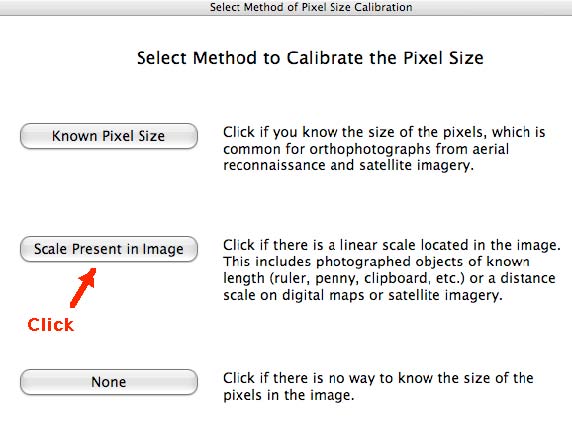
- Before making any measurements, calibrate the size of a pixel* to the size of an object of known length that is visible in the image. This procedure automatically starts after you select an image. To run the calibration method again, use the “Calibrate Pixel Size” in the File Menu.
* A pixel is the smallest portion of a digital image with uniform color. For most digital photos, the pixels are so small you won’t be able to see them.
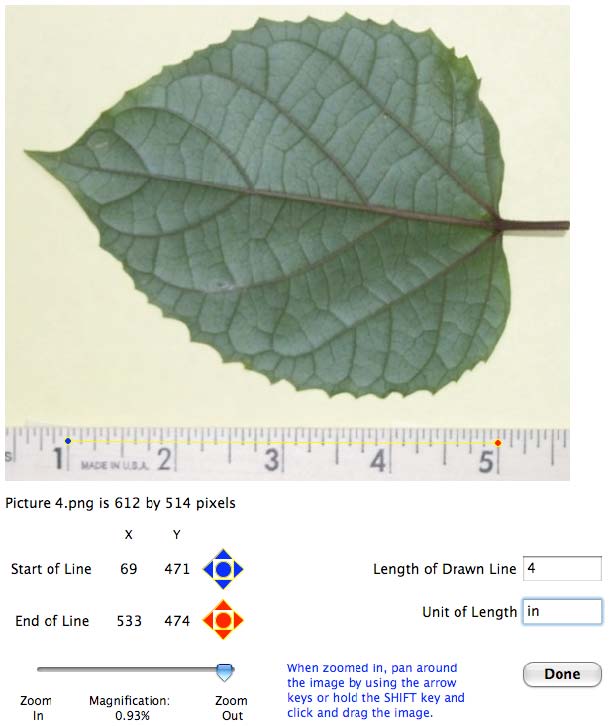
2. Click and drag the cursor between two marks of the ruler (or across an object of known length) in the image. In this example, the line is drawn from the 1-inch mark of the ruler (blue dot) to the 5-inch mark (red dot).
You can adjust more finely the ends of the line by either
- clicking and dragging the blue or red end of the line or
- click the small arrows that appear below the image that move the dots pixel by pixel.
3. Type in the known length of the line you drew and the Unit of Length in their respective boxes; then click the Done button.
TIPS:
- Use the longest length possible since this minimizes small errors of drawing the calibration line.
- To make measurements in centimeters rather than inches in this example, rather than entering “4” and “in” in the boxes, type “10.16” and “cm” instead.
(4 in x 2.54 cm/in = 10.16 cm.)
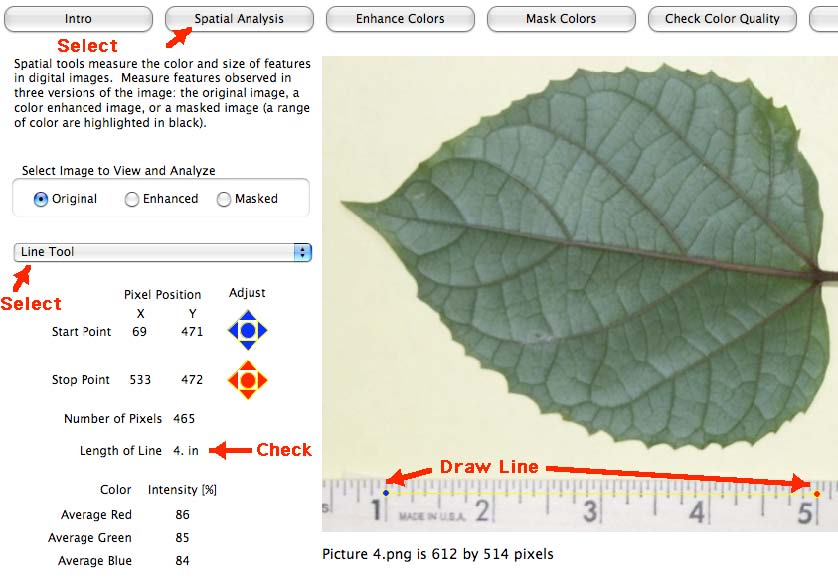
4. TEST YOUR CALIBRATION: After completing the calibration, use the “line tool” in the “Spatial Analysis” tab/window to measure the length of the ruler and check the the measurement is correct.
If the calibration is incorrect, recalibrate before moving on—in the File Menu, choose Calibrate Pixel Size.
Measure Length
- Make length measurements by clicking and dragging on features in the image. To adjust the ends of the line, either click and drag the blue or red end of the line or click the small Adjust arrows that appear to the left of the image.
In the leaf image, try for example measuring:
• length of the stem from the leaf tip to the bottom of the leaf
• average spacing of the leaf veins
• width of the leaf; ratio of width to length
• average spacing of the serrations on the edge of the leaf - If desired, Save values to a text file for use later with Excel or other spreadsheet/graphing software. To save measurements, use “Save Measurements” in the Measurements Menu. Besides the measurement, additional data are saved automatically to help check the quality of your measurements later.
- Open a variety of images and see if you can make length/distance measurements in those images.


