
Make Partial Solar Eclipse Viewing Goggles
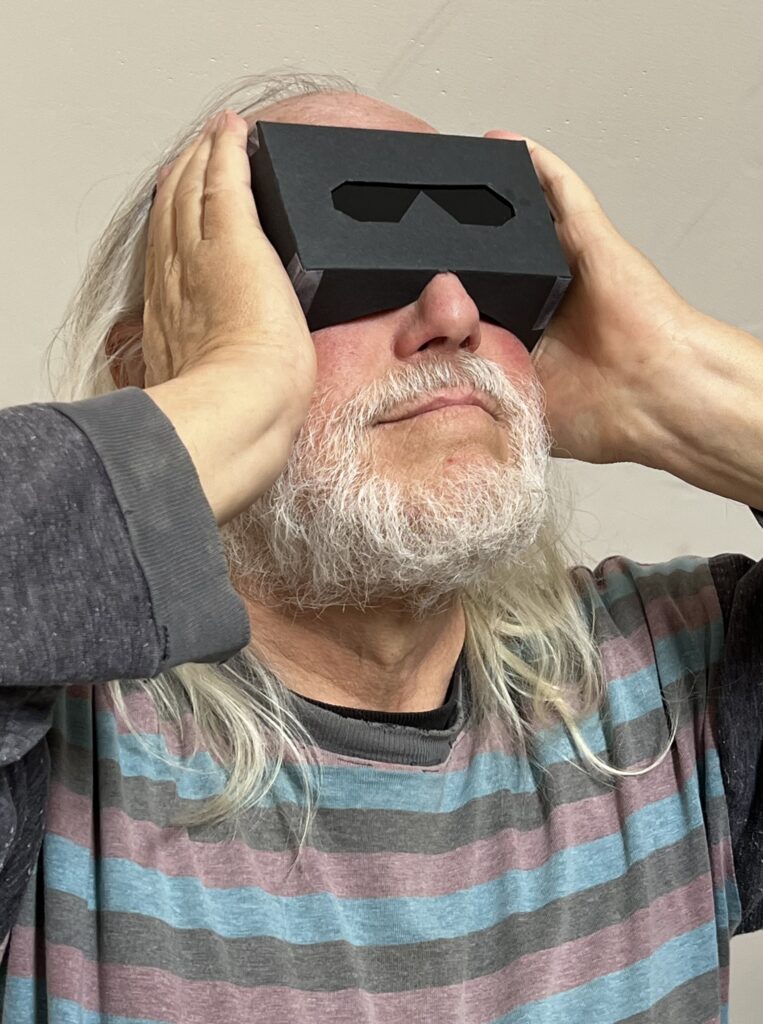
Solar eclipse “glasses” are a safe way to view the Sun during partial stages of a solar eclipse. But they are a bit awkward to use and the fact that bright sunlight surrounds the glasses makes the viewing not optimal or comfortable. Most people (especially children) don’t actually wear the glasses with the temple pieces behind their ears; they just hold them up to their eyes when they want a view of the Sun.
Enter solar eclipse goggles. Experience with welder’s goggles indicates that enclosing the eclipse glasses in goggles creates a MUCH more pleasant and enjoyable viewing experience. Moreover, since there is a lot less stray sunlight surrounding, the view is much higher quality.
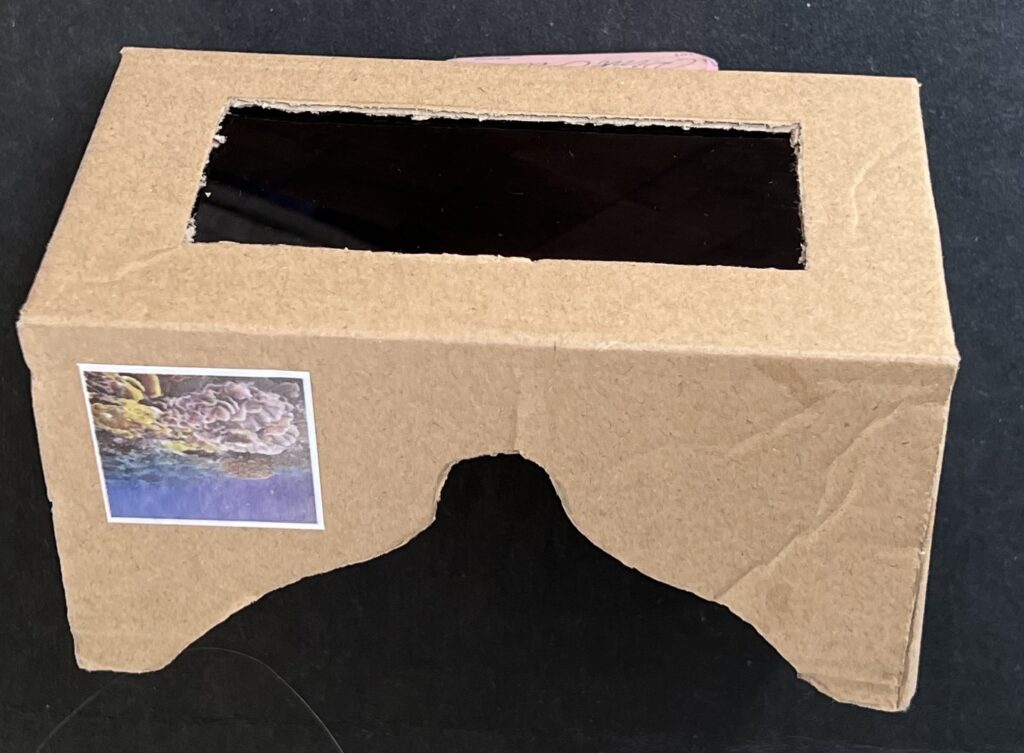
Below you may find a template and instructions for making do-it-yourself cardboard solar eclipse “goggles” in which you can fasten either commonly available eclipse glasses* (with plastic solar filters) or #14 welder’s glass (suitable for Sun viewing). Photo: a completed solar eclipse goggle with #14 welders glass secured inside.
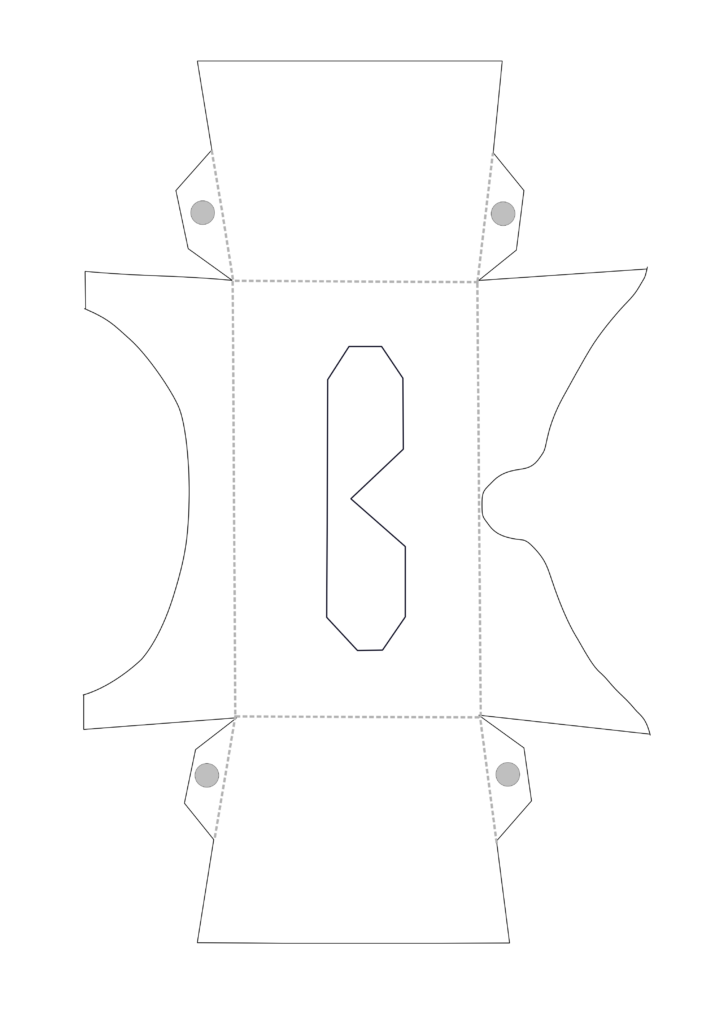
TEMPLATE:
Instructions
- Print the the solar eclipse goggles template (at right; save the image or open it in a new tab/window for printing). Choose a setting to fill 8.5″x11″ paper if available. Ideally, print on heavy card stock if possible.**
- If you use card stock, make a stencil for marking the outline on heavier cardboard. Otherwise, glue the template (blank side down) onto medium weight cardboard (large cereal or crackers box works fine).**
- Cut along the solid lines with scissors or a precision detail cutting (e.g. X-ACTO) knife.
- Fold along the dashed lines.** Use a straightedge (e.g. a ruler) to make clean folds.
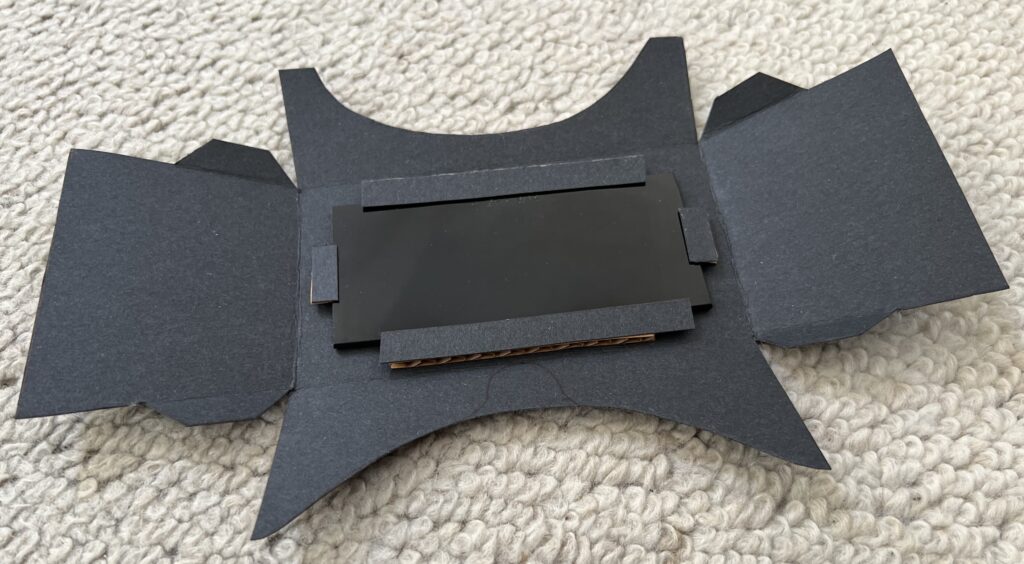
- Secure eclipse glasses behind the front opening with tape. Make sure the glasses completely cover the front opening with no cracks that would allow light to leak through. Alternatively secure #14 welder’s glass behind the front opening, with no light leaks. Duct tape can work well for that.***
- Position one of the tabs (with big black dot) so that the long folded edge of the tab is right under the adjacent cut edge that is about the same length. Then secure that edge with tape. Optional: put a tiny bit of glue on and around the black dot first. After the glue dries, the tape could be removed.
- Repeat step 6 with the other 3 tabs.
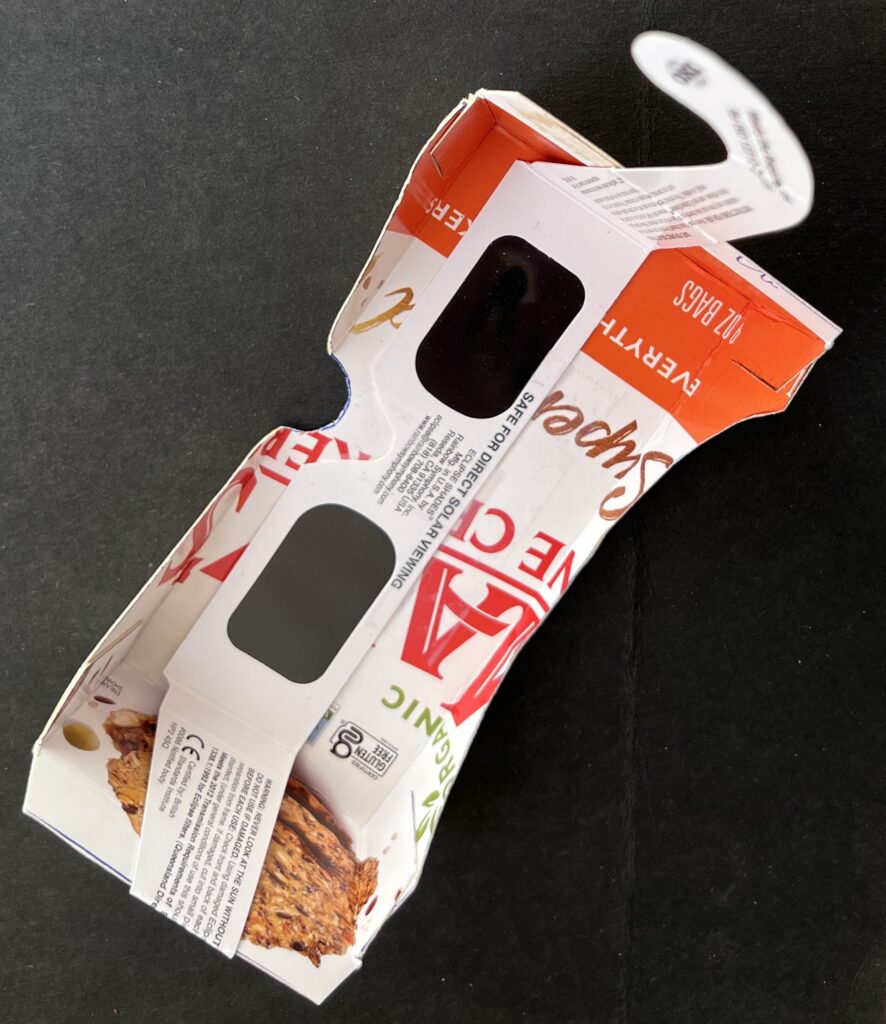
This photo shows an early version of solar eclipse goggles with eclipse glasses taped in. You can leave the temples of the glasses on, cut them off, or fold them down depending on your preference.
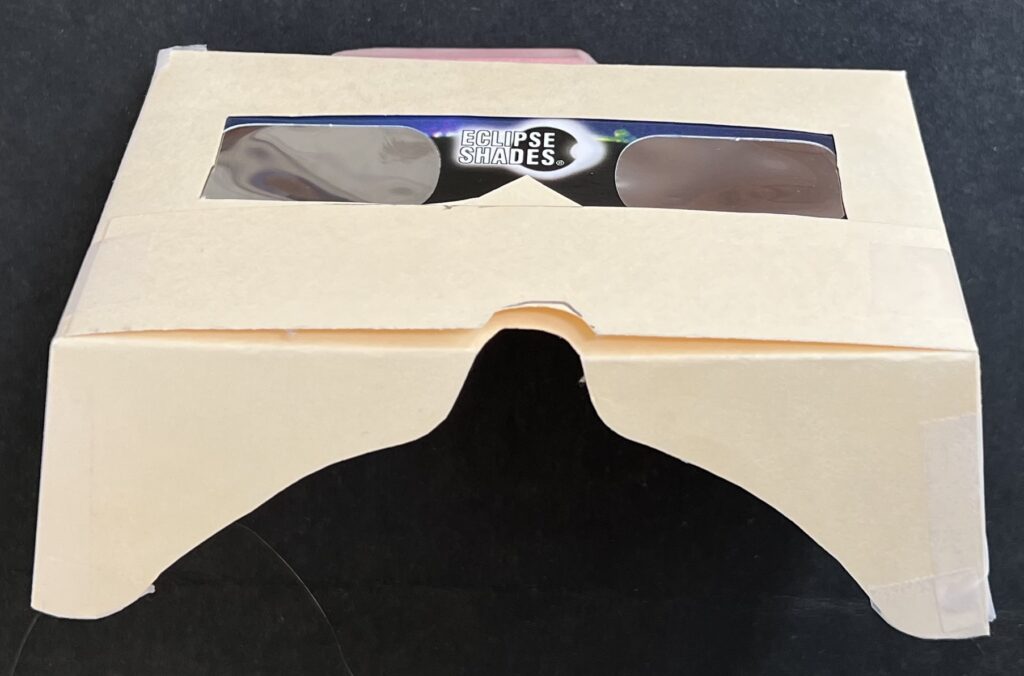
This is a front view of an earlier prototype of solar eclipse goggles made with a file folder and eclipse glass taped in. To really provide better blockage of stray sunlight, multiple layers of file folder would be needed. But it’s much easier/better to start with a heavier weight cardboard to begin with.
Another front view of an earlier prototype solar eclipse goggle made with lightweight corrugated cardboard and has #14 welder’s glass secured behind the front opening.
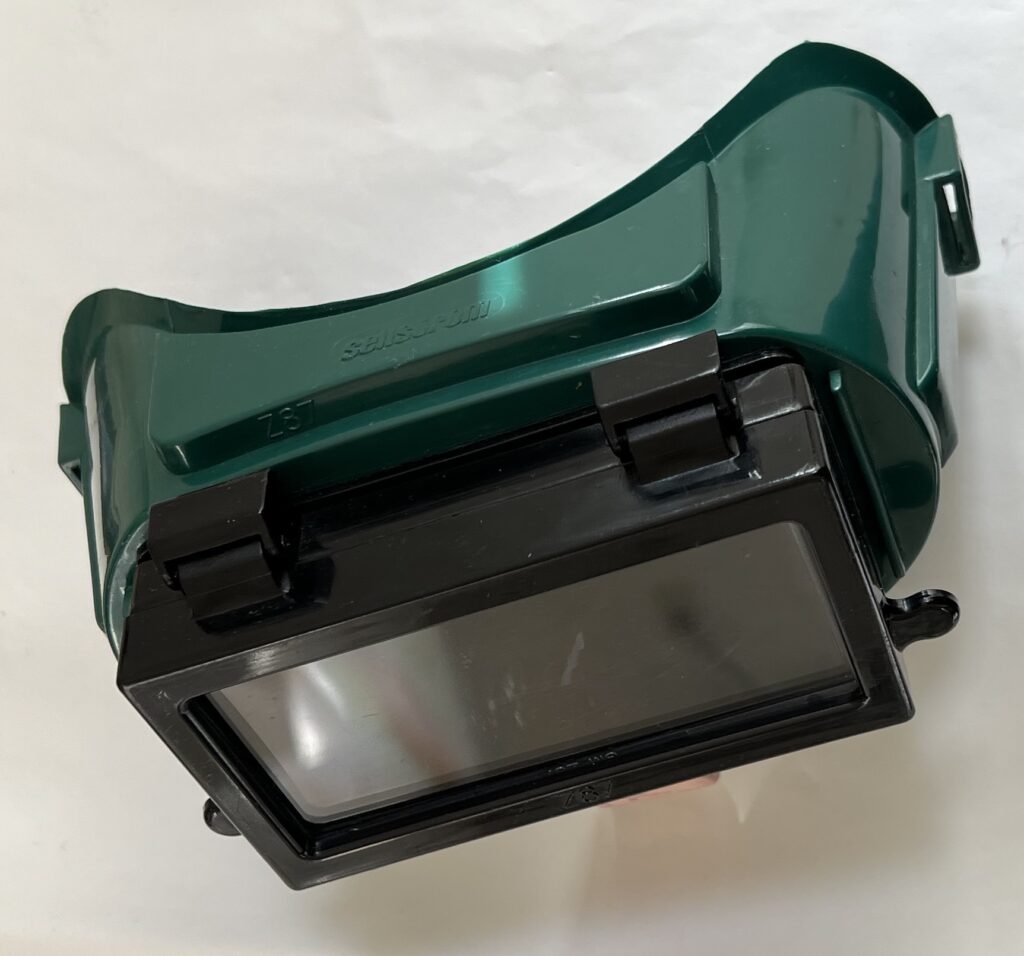
This photo is of the professional welder’s goggles that inspired the development of the cardboard solar eclipse goggles shown on this page.
* Sources of solar eclipse glasses:
Source of welder’s glass: https://safesolarviewing.com/
Rainbow Symphony – https://www.rainbowsymphony.com/products/solar-viewer-14-welders-glass
Other filter material from Thousand Oaks – https://thousandoaksoptical.com/products/eclipse/
** Making a stencil allows for making multiple goggles from one printout. The dashed lines will not be duplicated but you can still position the straight edge for folding between vertices.
***If using welder’s glass (#14)…
This page respectfully submitted by Alan Gould, former planetarium director, Lawrence Hall of Science.